You might already know that there are two parties engaged in a single sign on system.
- Identity Providers (IDP)
- Service Providers (SP)
First let's see How can we configure Weblogic as a Service Provider.
First you need to download and install Weblogic server. You can download it from here and follow the README.txt for the installation.
NOTE: Make sure you configure a new domain if you do not have one already.
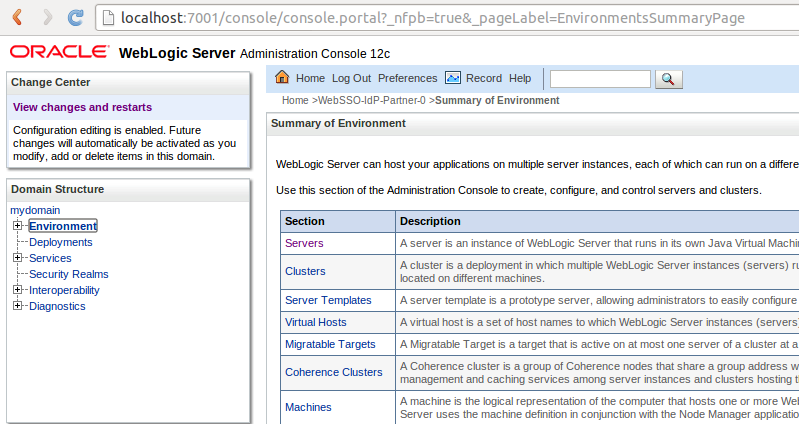
Start a browser and log in to Oracle weblogic server administration console at http://localhost:7001/console
We will be using appB as the sample test application which you can download from here.
Deploy appB in the Weblogic server.
- Go to Deployments under <mydomain> and click install.

- Click upload your file(s) and browse appB.
- Keep all the default options and finish deployment.
Create a user in security realms.
- Go to Security Realms --> myrealm

- Select Users and Groups tab and Add a New user. (If you are using above appB, create your user as ssouser, because in weblogic.xml file of appB <principal-name> is defined as ssouser.)

Create SAML2 Identity Asserter.
- Go to Security Realms --> myrealm
- Providers tab --> Authentication tab and select New.

- Create an Identity Asserter choosing the type as SAML2IdentityAsserter

- Click on the just created SAML2IdentityAsserter and select Management tab. (You need to restart the admin server before this step to get the changes affected.)
- Click on New and select New Web Single Sign-On Identity Provider Partner.

- Browse and give the metadata file of WSO2 Identity Server. (NOTE : At the moment with IS 4.5.0 , it is not possible to auto generate the metadata file. The below given metadata file is one I created manually following the spec. )

- Click on the just created Identity Provider Partner and fill the details, tick the options as below and Click Save.

- Verify whether your metadata file has parsed correctly by navigating to Single Sign-On Signing Certificate tab and Single Sign-On Service Endpoints tab.
Configure at server level.
- Go to Environment --> Servers and Click on myserver(admin).
- Tick the SSL Listen Port Enabled option and Save.

NOTE: We will be using the demo Keystore and if you need you can have your own custom keystore.
SAML2 General Tab configurations.
- Go to Federation Services tab --> SAML 2.0 General tab.
- Fill the fields with relevant information as shown below and Save.

SAML2 Service Provider Tab configurations.
- Go to Federation Services tab --> SAML 2.0 Service Provider tab.
- Enable it and Save.

Publish Metadata. (Incase your IDP requires a metadata file from Weblogic server.)
- Go back to SAML2 General tab and Click on Publish Meta Data.

- Provide a location to save the Weblogic metadata file.
Create SAML Authentication Provider.
- Go to Security Realms --> myrealm
- Providers tab --> Authentication tab and select New.
- Create SAML Authenticator choosing the type as SAMLAuthenticator.

- Click on the just created SAMLAuthenticator.
- Go to Configuration tab --> Common tab and select Control Flag as Sufficient.

Go to DefaultAuthenticator and select Control Flag as Sufficient as well.
Now we have done with configuring Weblogic server as the service provider.
Let's have a look how can we configure WSO2 IS to serve as the Identity provider.
Start WSO2 Identity server (tested in IS 4.5.0) and login as admin.
Create the same user you created in Weblogic server in Identity Server.
- Go to Configure tab and click on Users.
- Click on Add New User and add the same user.
- Give Login permission to that user.
Register new Service Provider.
- Go to Main tab and select SAML SSO under Manage.
- Click on Register New Service Provider.
- Fill the data as below and click Register.

Restart the weblogic server + WSO2 IS and go to http://localhost:7001/appB/admin/services.jsp and you will be redirected to WSO2 Identity server SAML sso page.

Log in with the created user ( in our case ssouser )
If you see the below page, Congratulations !!! You have configured WSO2 IS as SAML2 IDP and Weblogic as SP.

Acknowledgement
- My thanks goes to Prabath and Dulanja at WSO2.
- Gilles for this excellent blog post.
Hi Tanya, We map a role to role principal in weblogic.xml
ReplyDeleteHowever wso2 is not honoring that membership,
Is there a configuration setting in weblogic or wso2 that would correct this and ensure that the user is a member of the group poc before granting authorisation. At the moment. The user is authorised as long as they have been setup and they enter the correct password.
Thanks in advance,
Ann
role-test
poc
Hi Ann,
ReplyDeleteWill try it out and update you soon.
Thanks
1. Mention the group name in your weblogic.xml file of the app. (Ex: poc)
Delete2. Create a group in weblogic server as poc and the authorized users to that particular group.
How you get metadata from wso2?
ReplyDeleteHi Marcos,
ReplyDeleteSorry for the delay in replying. Currently WSO2 Identity Server is not capable of generating a metadata file. But sooner we will provide that feature with a future release. I have prepared the above given metadata file manually considering the available standards.
Hope this helps.
Identity and access management (I&AM) is a relatively new term that means different things to different people.But yet provide the critical IT foundations to help businesses realize the benefits of Identity.www.gluu.org
ReplyDeletehi when I am logging in as ssouser/welcome1 I am getting authentication failed "Authentication Failed! Please Retry" from WSO2 login page. Could you please tell me what I am doing wrong here?
ReplyDeleteI really need help understanding this. I wish you still checked this blog.
ReplyDeleteHi, I've been able to configure the SAML SSO as you describe above.
ReplyDeleteNow I wonder how can I issue a logout request to WSO2 IS?
Could you give me an insight to achieve this?
hi, every thing is perfect, except when i am authenticated it displays welcome null and not welcome ssouser. any help tania? thank you
ReplyDeleteHi Ichak,
ReplyDeleteCode for getting the username in the appB is at the admin/service.jsp. (Extract appB.war and go to service.jsp)
At the service.jsp you will see a line like below.
Welcome <%=request.getRemoteUser()%>
As per Oracle community [1] this request.getRemoteUser() needs to be changed as request.getUserPrincipal( ).getName( );
So above line will be
Welcome <%=request.getUserPrincipal( ).getName( )%>
Please note that this is due to an api change from Oracle side and not due to any change in WSO2 side.
[1] https://community.oracle.com/thread/2418560?start=0&tstart=0
Hi Tanya,
ReplyDeleteAfter providing login details it redirects to https://localhost:7002/saml2/sp/acs/post url but in browser it shows below error:
This site can’t provide a secure connection
localhost sent an invalid response.
Try running Windows Network Diagnostics.
ERR_SSL_PROTOCOL_ERROR
Any help would be great.
Thanks